Quickstart
PipeCD consists of two components: the Control Plane and the piped agent (see PipeCD concepts). The Control Plane is a regular web service application that can be installed anywhere, while the piped agent is a single binary that can run as a pod in a Kubernetes cluster, a container on ECS, a serverless function on Lambda or Cloud Run, or a process running directly on your local machine.
This page walks you through installing both components into your Kubernetes cluster and deploying a “hello world” application to that same Kubernetes cluster.
Note:
- You don’t need to install the PipeCD Control Plane on the cluster where your applications are running. See this blog post to understand how PipeCD is operated in real life use cases.
- If you want to experiment with PipeCD freely or don’t have a Kubernetes cluster, we recommend this Tutorial.
Prerequisites
- A running Kubernetes cluster, such as minikube or kind.
- kubectl installed and connected to the cluster.
1. Installing PipeCD in quickstart mode
1.1. Installing PipeCD Control Plane
kubectl create namespace pipecd
kubectl apply -n pipecd -f https://raw.githubusercontent.com/pipe-cd/pipecd/master/quickstart/manifests/control-plane.yaml
The Control Plane pods pull their container images on the first run, which can take a few minutes. Wait until all pods are 1/1 Running with kubectl get pod -n pipecd.
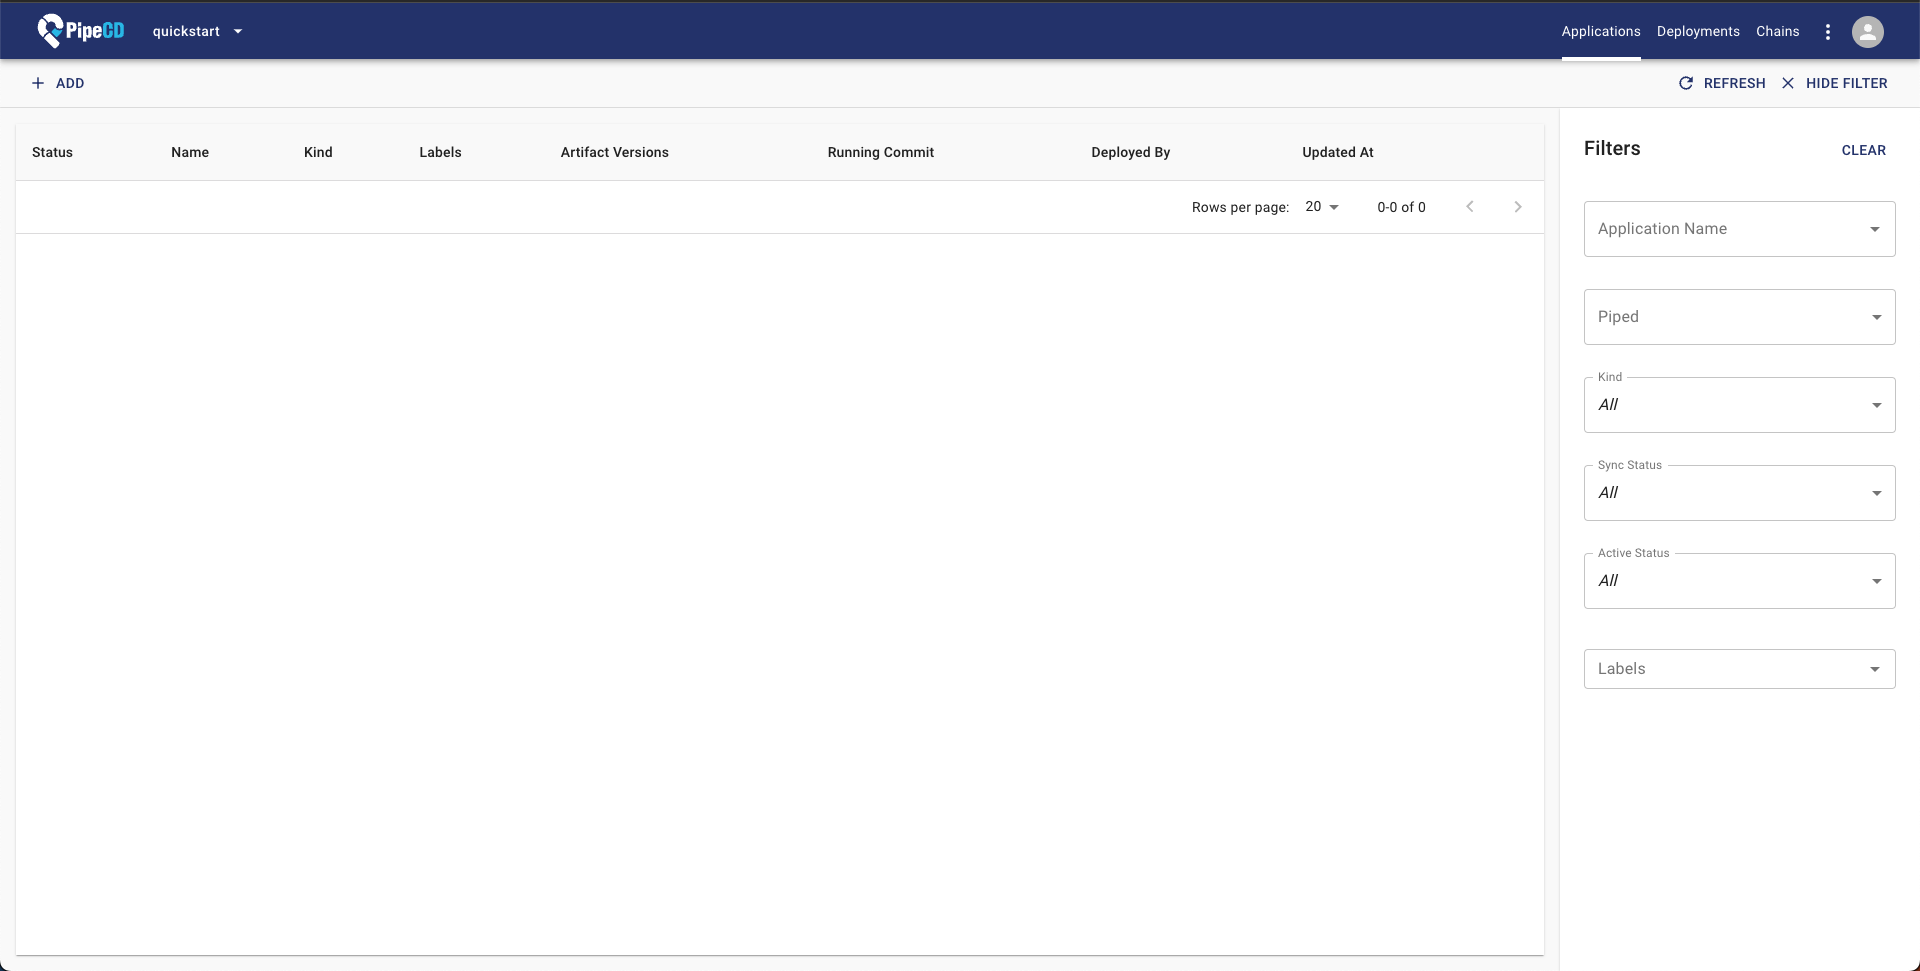
The PipeCD Control Plane is installed with a default project named quickstart. To access the PipeCD console, run:
kubectl port-forward -n pipecd svc/pipecd 8080
You can access the PipeCD console at http://localhost:8080?project=quickstart.
For this quickstart setup, the project name is fixed to quickstart. If you open http://localhost:8080 directly, enter quickstart on the login screen.
To log in, use the configured static admin account:
- username:
hello-pipecd - password:
hello-pipecd
After logging in, you will see the main page of the PipeCD console, which looks like this:
For more about PipeCD Control Plane management, see Managing Control Plane.
1.2. Installing Piped
Next, install a piped agent to the cluster to perform CD tasks.
From your logged in tab, navigate to the piped settings page at http://localhost:8080/settings/piped?project=quickstart.
Click the +ADD button at the top left of the page and enter a name for the piped agent (for example, dev).
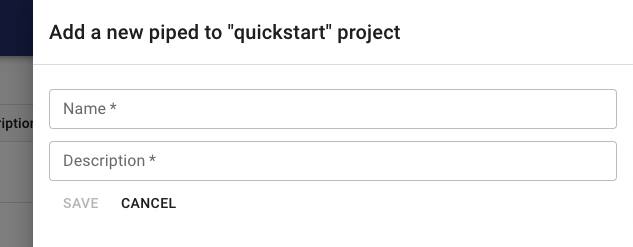
Click the Save button, and then you can see the generated piped ID and secret key.
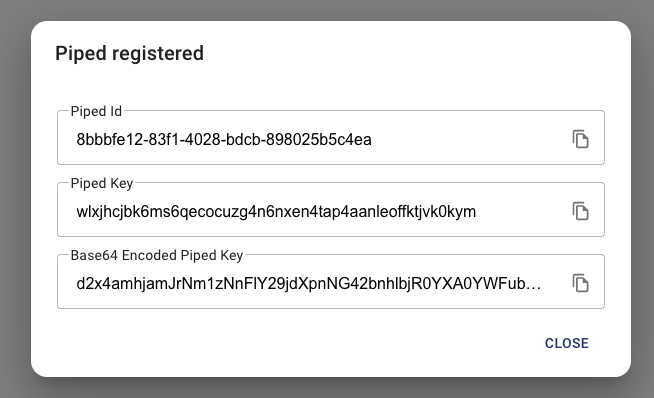
Note: The
Piped Idis the UUID generated after you clickSave(for example,7c17c8f8-...), not the name you entered while registering. Using the name instead of the UUID causes anunable to find piped from datastoreerror in the piped logs.
Copy the two values, Piped Id and Base64 Encoded Piped Key, and fill them in <COPIED_PIPED_ID> and <COPIED_ENCODED_PIPED_KEY> respectively in the command below:
curl -s https://raw.githubusercontent.com/pipe-cd/pipecd/master/quickstart/manifests/piped.yaml | \
  sed -e 's/<YOUR_PIPED_ID>/<COPIED_PIPED_ID>/g' \
      -e 's/<YOUR_PIPED_KEY_DATA>/<COPIED_ENCODED_PIPED_KEY>/g' | \
  kubectl apply -n pipecd -f -
For more about Piped management, see Managing Piped.
That’s all! You are ready to use PipeCD to manage your application’s deployment.
You can check the readiness of all PipeCD components via command:
kubectl get pod -n pipecd
NAME                              READY   STATUS    RESTARTS   AGE
pipecd-cache-56c7c65ddc-xqcst     1/1     Running   0          38m
pipecd-gateway-58589b55f9-9nbrv   1/1     Running   0          38m
pipecd-minio-677999d5bb-xnb78     1/1     Running   0          38m
pipecd-mysql-6fff49fbc7-hkvt4     1/1     Running   0          38m
pipecd-ops-779d6844db-nvbwn       1/1     Running   0          38m
pipecd-server-5769df7fcb-9hc45    1/1     Running   0          38m
piped-8477b5d55d-74s5v            1/1     Running   0          97s
2. Deploy a Kubernetes application with PipeCD
Your PipeCD installation (both Control Plane and agent) is now complete. Let’s use it to deploy your first Kubernetes application with PipeCD.
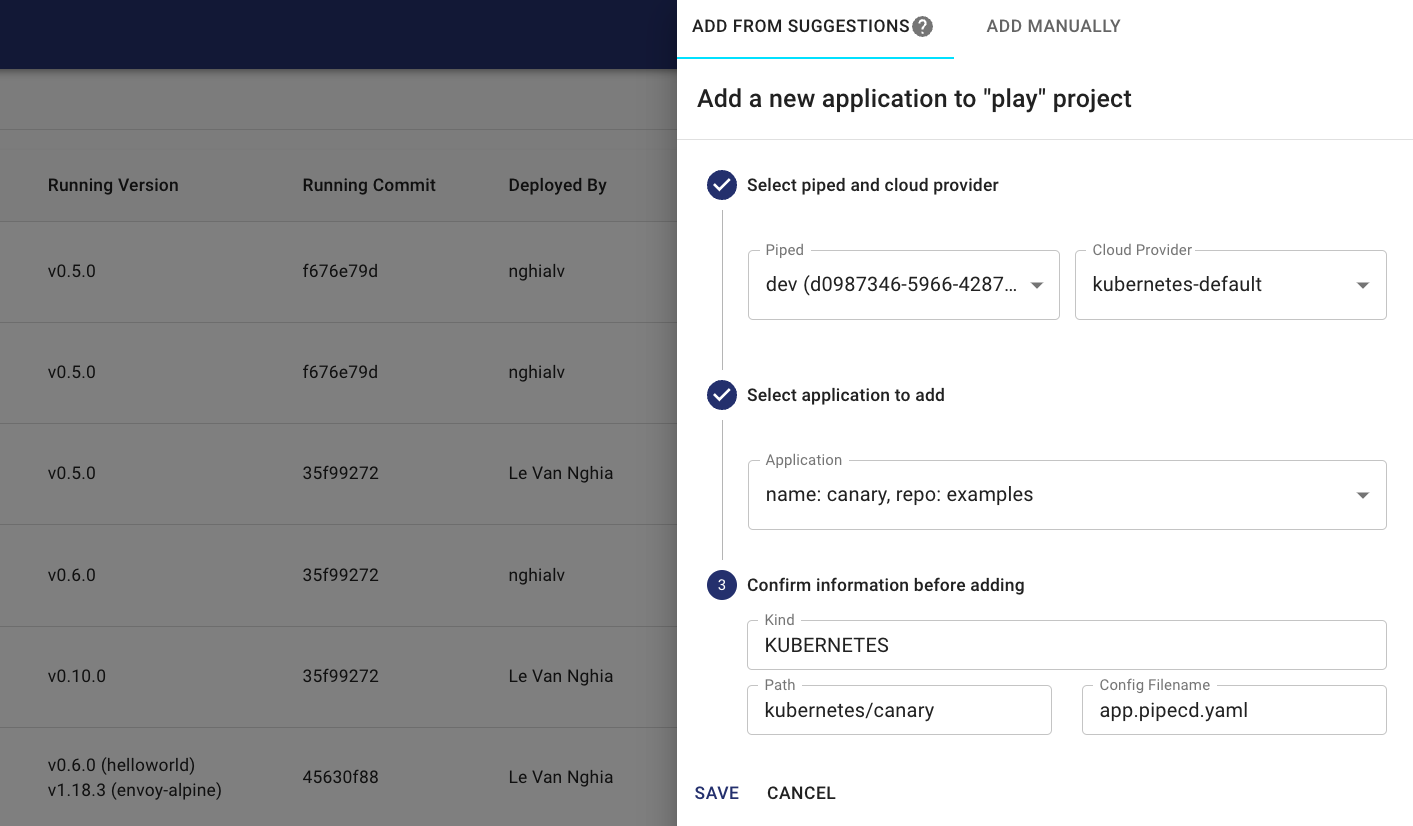
Navigate to the Applications page, click on the +ADD button on the top left corner.
Go to the ADD FROM SUGGESTIONS tab, then select:
- Piped that you have just registered (e.g.
dev) - PlatformProvider:
kubernetes-default
Note: The piped agent needs a minute or two after connecting to clone the examples repository and discover applications. If the list is empty, wait a moment and reload the page.
You should see a list of suggested applications. Select one and click the SAVE button to register it.
The first deployment starts automatically and syncs the application to the state specified in the current Git commit.
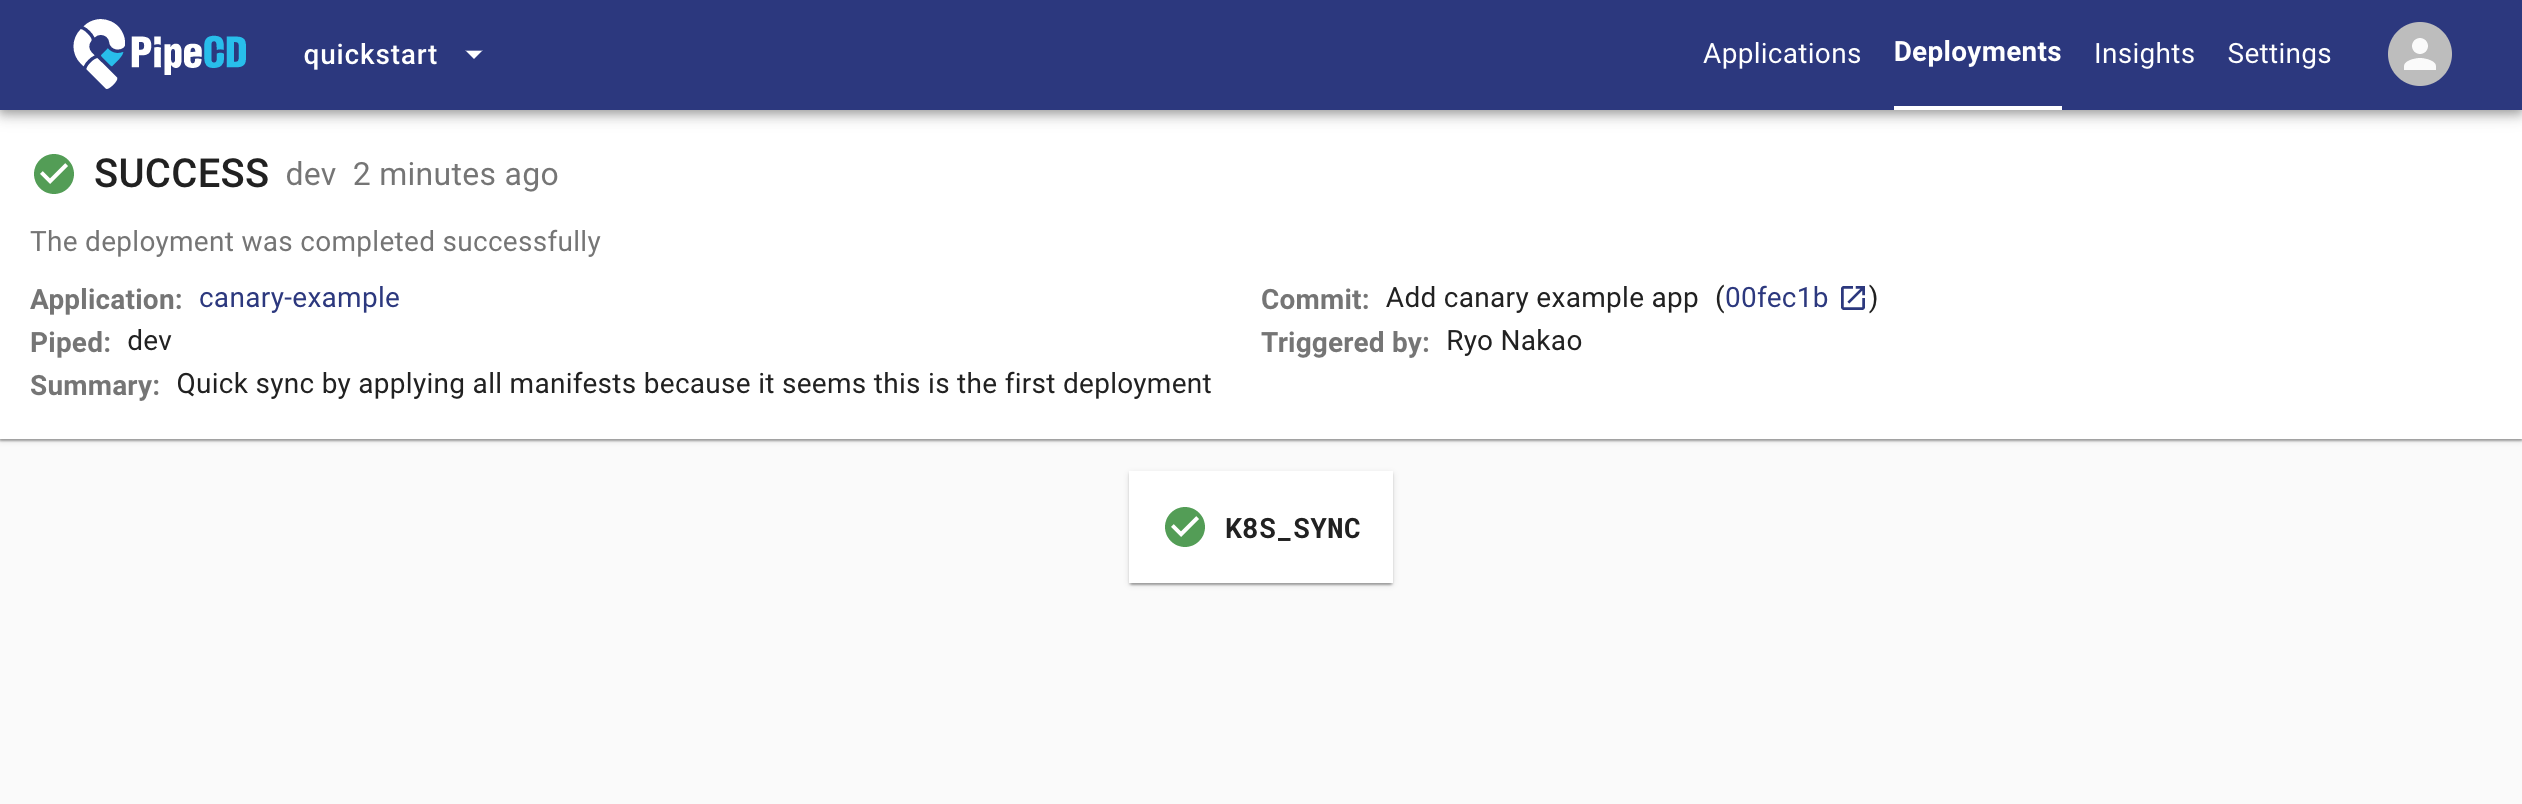
For more about managing applications’ deployment with PipeCD, see Managing application.
3. Cleanup
When you’re finished experimenting with PipeCD quickstart mode, you can uninstall it using:
kubectl delete ns pipecd
What’s next?
To prepare your PipeCD for a production environment, see the Installation guide. For guidelines to use PipeCD to deploy your application in daily usage, see the User guide docs.
To set up the development environment and start contributing to PipeCD, see the Contributor guide docs.
Feedback
Was this page helpful?
Glad to hear it! Please tell us how we can improve.
Sorry to hear that. Please tell us how we can improve.
