Canary deployment for Kubernetes app with PodSelector
Using service mesh like Istio helps you doing canary deployment easier with many powerful features, but not all teams are ready to use service mesh in their environment. This page will walk you through using PipeCD to enable canary deployment for Kubernetes application running in a non-mesh environment.
Basically, the idea behind is described as this Kubernetes document; the Service resource uses the common label set to route the traffic to both canary and primary workloads, and percentage of traffic for each variant is based on their replicas number.
Enabling canary strategy
Assume your application has the following Service and Deployment manifests:
- service.yaml
apiVersion: v1
kind: Service
metadata:
  name: helloworld
spec:
  selector:
    app: helloworld
  ports:
    - protocol: TCP
      port: 9085
- deployment.yaml
apiVersion: apps/v1
kind: Deployment
metadata:
  name: helloworld
  labels:
    app: helloworld
    pipecd.dev/variant: primary
spec:
  replicas: 30
  revisionHistoryLimit: 2
  selector:
    matchLabels:
      app: helloworld
      pipecd.dev/variant: primary
  template:
    metadata:
      labels:
        app: helloworld
        pipecd.dev/variant: primary
    spec:
      containers:
      - name: helloworld
        image: gcr.io/pipecd/helloworld:v0.1.0
        args:
          - server
        ports:
          - containerPort: 9085
In PipeCD context, manifests defined in Git are the manifests for primary variant, so please note to ensure that your deployment manifest contains pipecd.dev/variant: primary label and selector in the spec.
To enable canary strategy for this Kubernetes application, you will update your application configuration file to be as below:
apiVersion: pipecd.dev/v1beta1
kind: KubernetesApp
spec:
  pipeline:
    stages:
      # Deploy the workloads of CANARY variant. In this case, the number of
      # workload replicas of CANARY variant is 50% of the replicas number of PRIMARY variant.
      - name: K8S_CANARY_ROLLOUT
        with:
          replicas: 50%
      - name: WAIT_APPROVAL
        with:
          duration: 10s
      # Update the workload of PRIMARY variant to the new version.
      - name: K8S_PRIMARY_ROLLOUT
      # Destroy all workloads of CANARY variant.
      - name: K8S_CANARY_CLEAN
That is all, now let try to send a PR to update the container image version in the Deployment manifest and merge it to trigger a new deployment. Then, PipeCD will plan the deployment with the specified canary strategy.
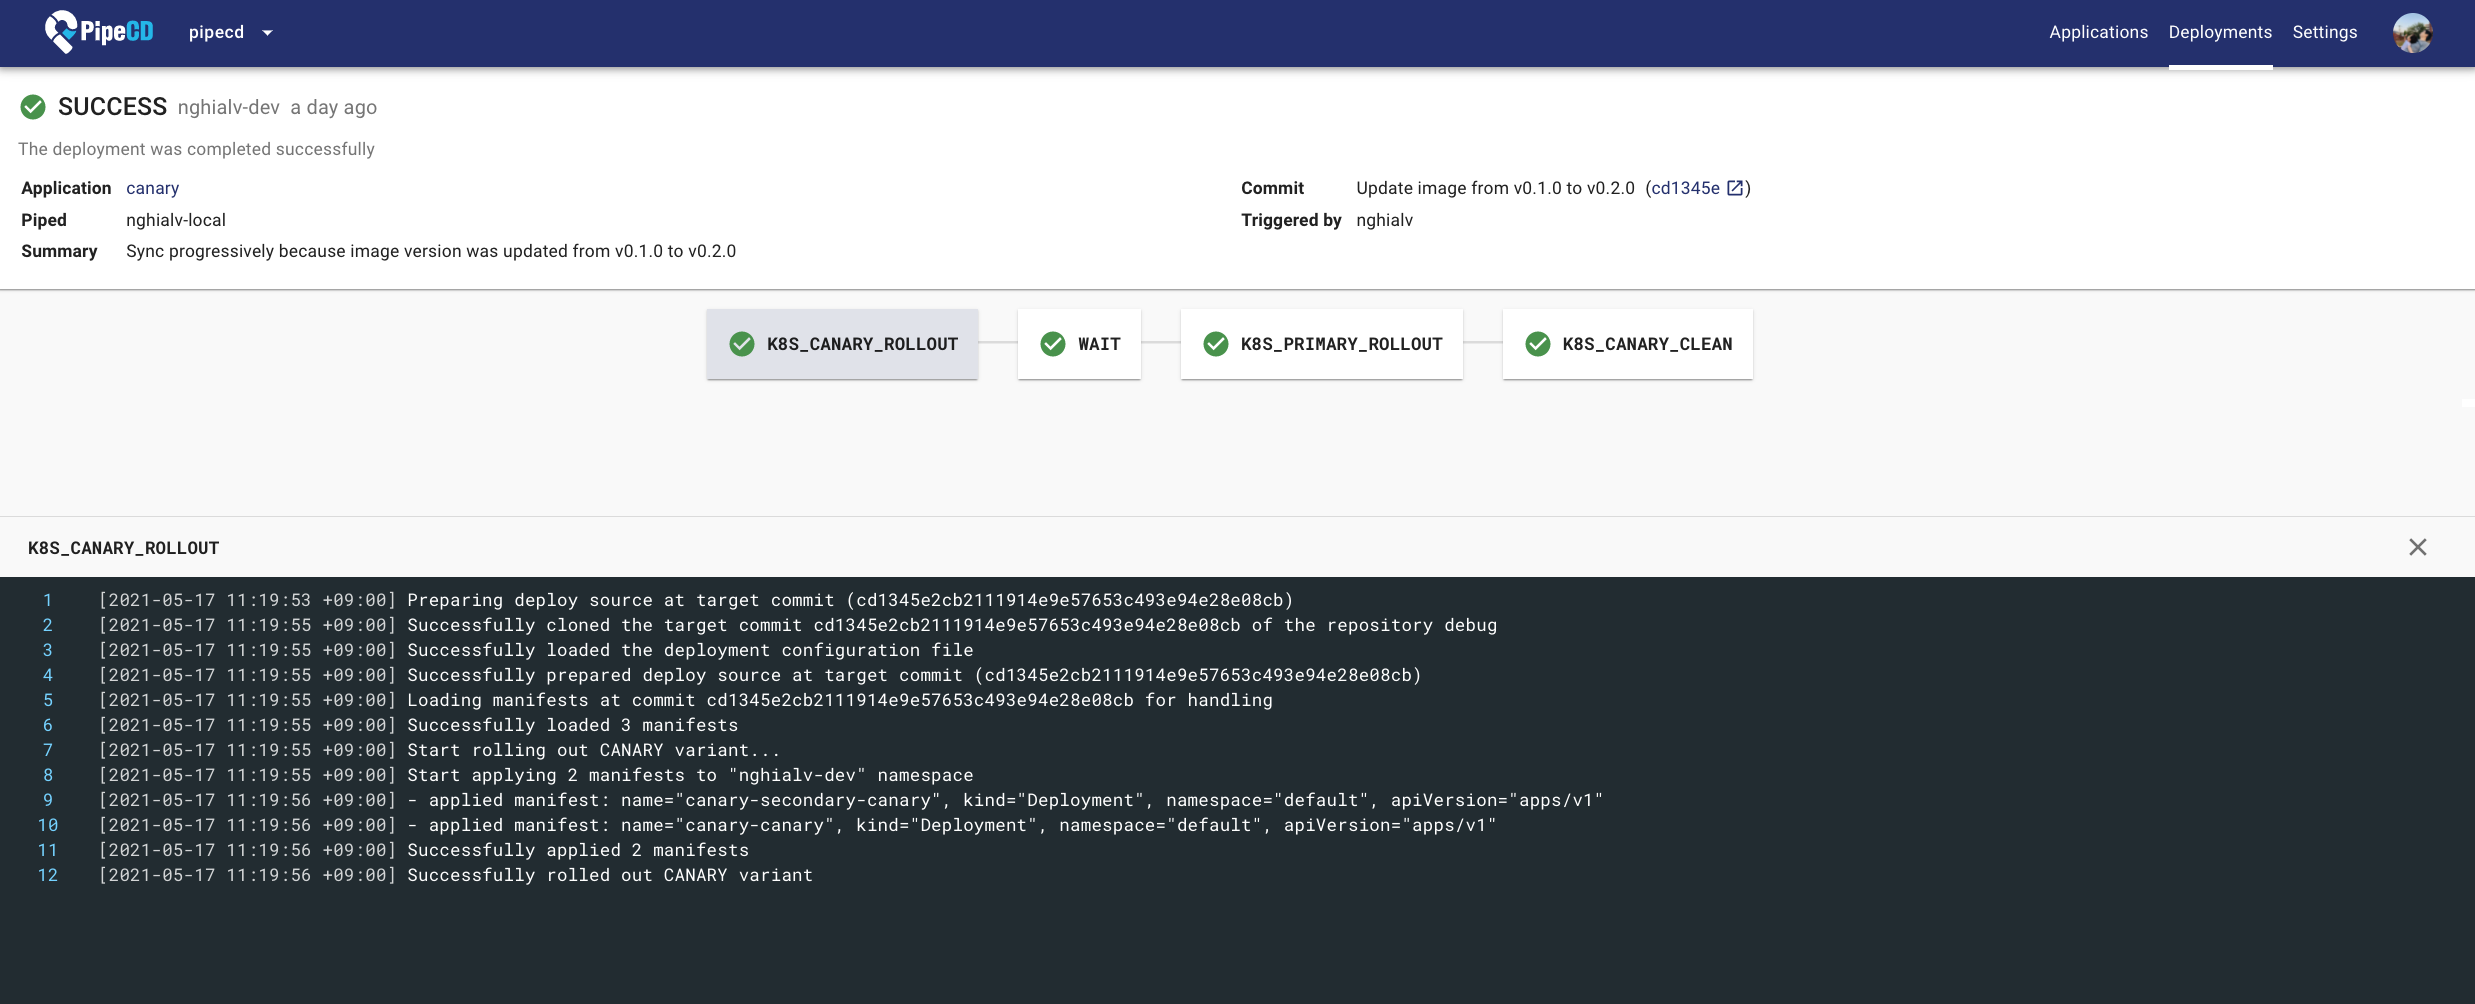
Deployment Details Page
Complete source code for this example is hosted in pipe-cd/examples repository.
Understanding what happened
In this example, you configured your application to be deployed with a canary strategy using a native feature of Kubernetes: pod selector.
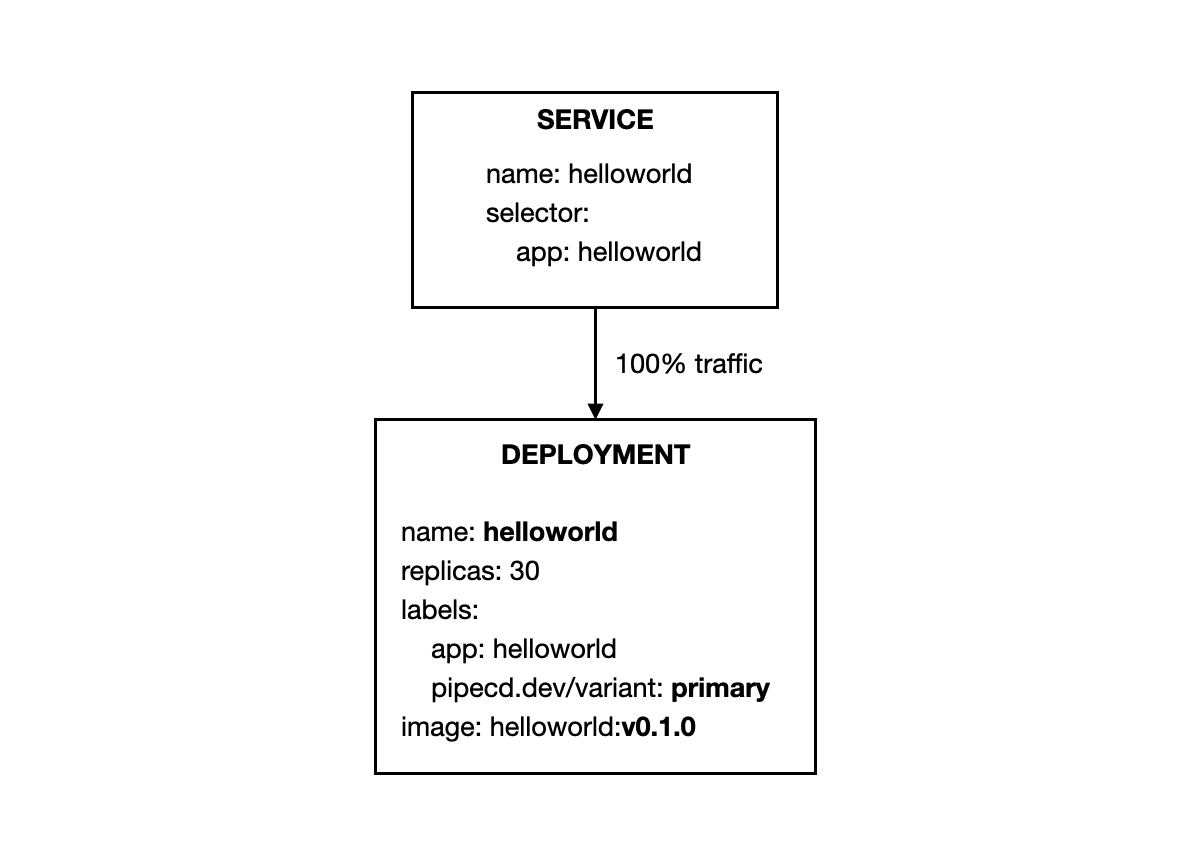
The traffic will be routed to both canary and primary workloads because they are sharing the same label: app: helloworld.
The percentage of traffic for each variant is based on the respective number of pods.
Here are what happened in details:
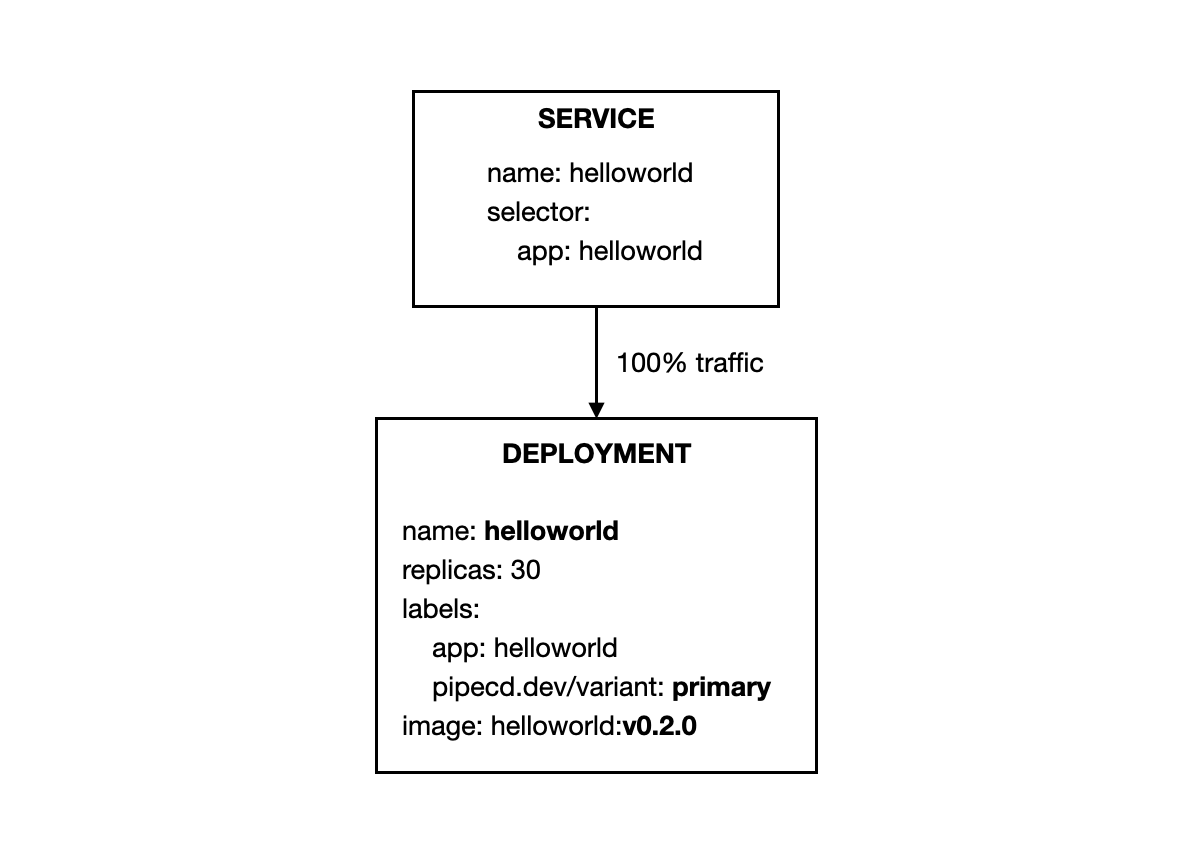
- Before deploying, all traffic gets routed to primary workloads.
- Stage 1:
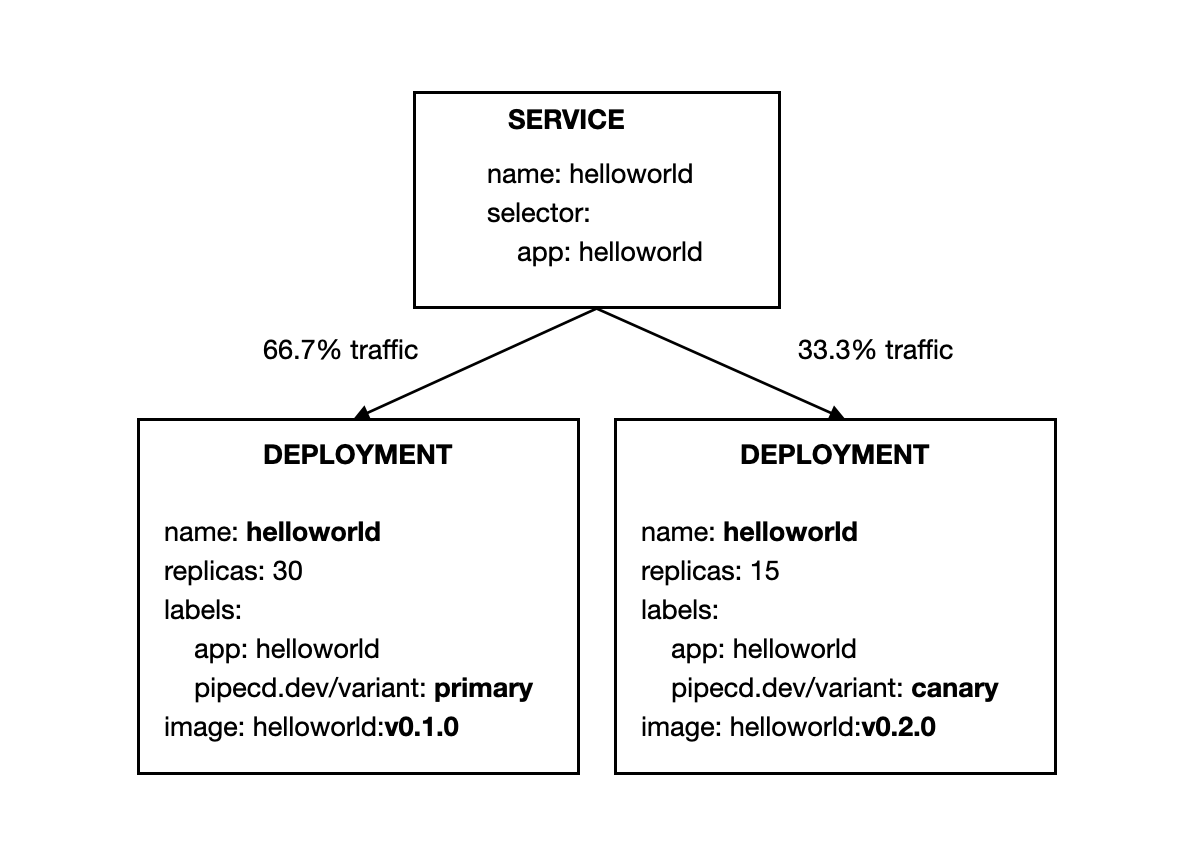
K8S_CANARY_ROLLOUTensures that the workloads of canary variant (new version) should be deployed. The number of workloads (e.g. pod) for canary variant is configured to be 50% of the replicas number of primary variant. It means 15 canary pods will be started, and they receive 33.3% traffic while primary workloads receive the remaining 66.7% traffic.
-
Stage 2:
WAIT_APPROVALwaits for a manual approval from someone in your team. -
Stage 3:
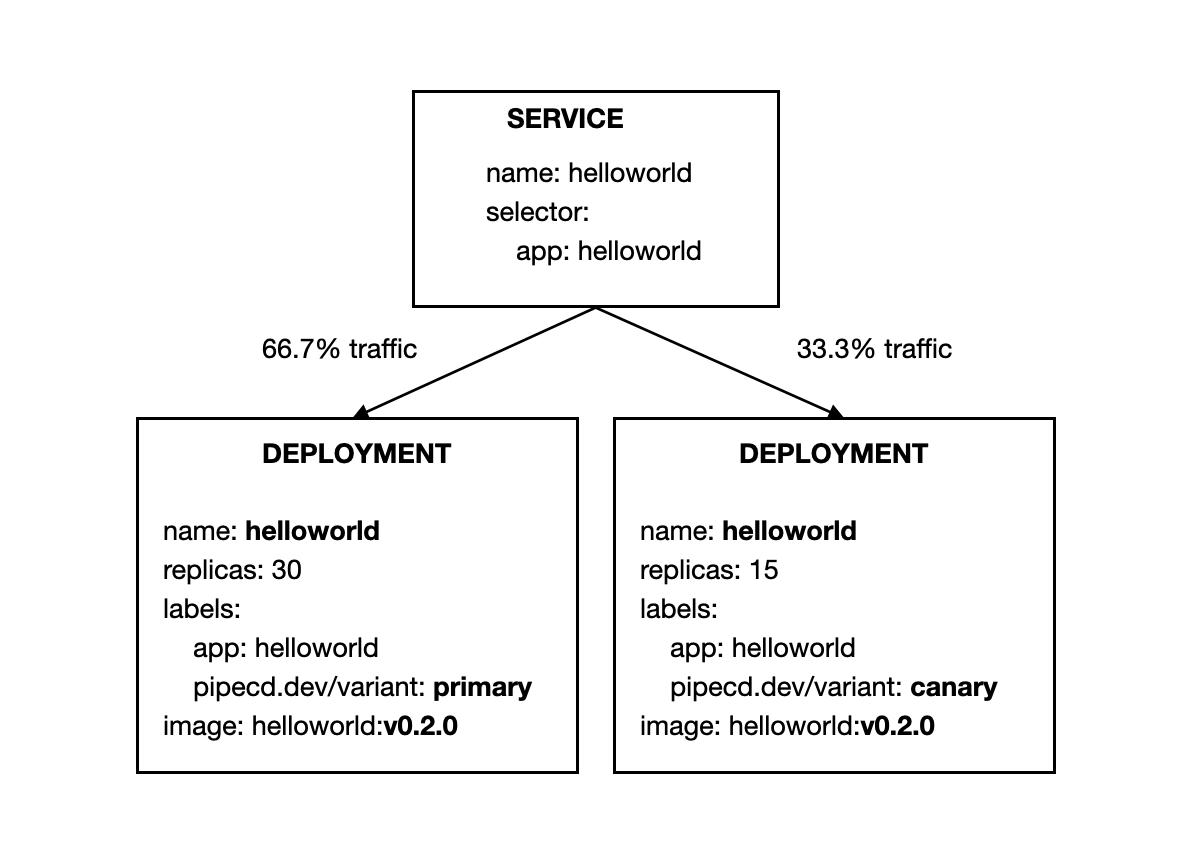
K8S_PRIMARY_ROLLOUTensures that all resources of primary variant will be updated to the new version.
- Stage 4:
K8S_CANARY_CLEANensures all created resources for canary variant should be destroyed. After that, the primary workloads running in with the new version will receive all traffic.
Feedback
Was this page helpful?
Glad to hear it! Please tell us how we can improve.
Sorry to hear that. Please tell us how we can improve.