Quickstart
This page is a guideline for installing PipeCD into your Kubernetes cluster and deploying a “hello world” application to that same Kubernetes cluster.
Note: It’s not required to install the PipeCD control plane to the cluster where your applications are running. Please read this blog post to understand more about PipeCD in real life use cases.
Prerequisites
- Having a Kubernetes cluster and connect to it via kubectl.
- Forked the Examples repository
- Prepare for authentication to GitHub Container Registry.
1. Installing PipeCD in quickstart mode
1.1. Installing PipeCD client
The official PipeCD client named pipectl can be installed using the following command
# OS="darwin" or "linux"
curl -Lo ./pipectl https://github.com/pipe-cd/pipecd/releases/download/v0.57.0/pipectl_v0.57.0_{OS}_amd64
Then make the pipectl binary executable
chmod +x ./pipectl
You can also move the pipectl binary to the $PATH for later use
sudo mv ./pipectl /usr/local/bin/pipectl
1.2. Installing PipeCD’s components
We can simply use pipectl quickstart command to start the PipeCD installation process and follow the instruction
pipectl quickstart --version v0.57.0
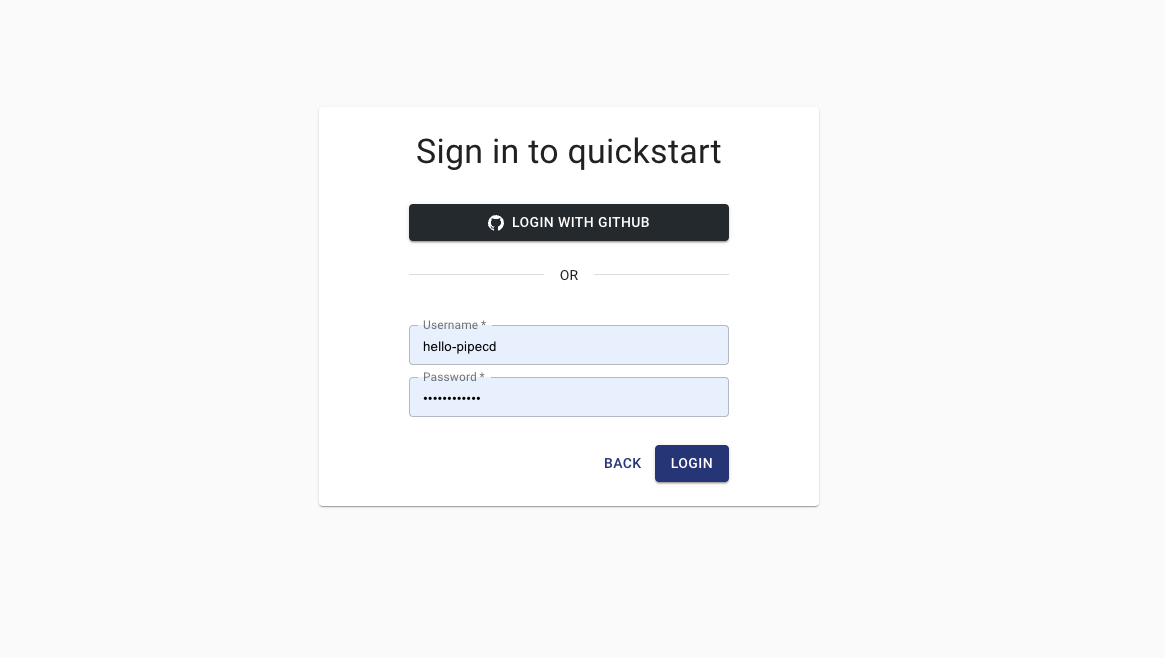
Follow the instruction, the PipeCD control plane will be installed with a default project named quickstart. You can access to the PipeCD console at http://localhost:8080 and pipectl command will open the PipeCD console automatically in your browser.
To login, you can use the configured static admin account as below:
- username:
hello-pipecd - password:
hello-pipecd
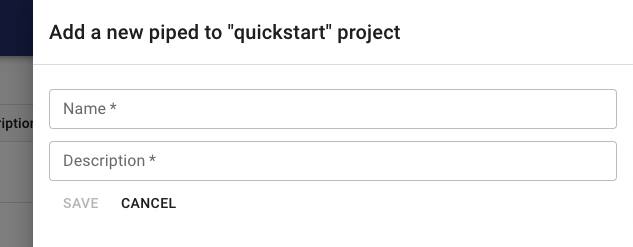
After successfully logging in, the browser will redirect you to the PipeCD console settings page at the piped settings tab. You will find the +ADD button on the top of this page, click there and insert information to register the deployment runner for PipeCD (called piped).
Click on the Save button, and then you can see the piped-id and secret-key.
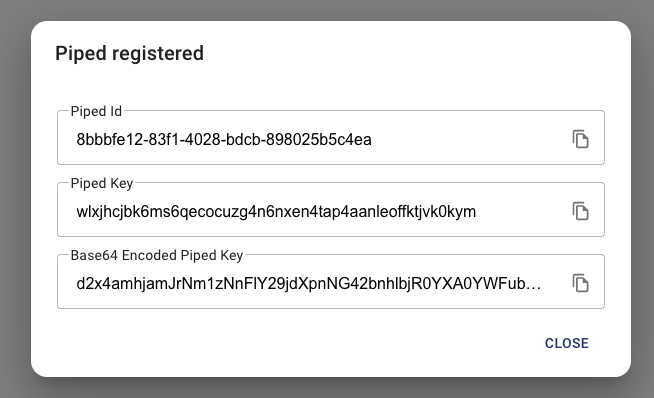
Use the above value to fill the form showing on the terminal you run pipectl quickstart command
...
Fill up your registered Piped information:
✔ ID: 2bf655c6-d7a8-4b97-8480-43fb0155539e
✔ Key: 02s3b0b6bo07kvzr8662tke4i292uo5n8w1x9pn8q9rww5lk0b
GitRemoteRepo: https://github.com/{FORKED_GITHUB_ORG}/examples.git
That’s all!
Note: The pipectl quickstart command will run continuously to expose your PipeCD console on localhost:8080. If you stop the process, the installed PipeCD components will not be lost, you can access to the PipeCD console anytime using kubectl port-forward command
kubectl -n pipecd port-forward svc/pipecd 8080
2. Deploy a kubernetes application with PipeCD
Above is all that is necessary to set up your own PipeCD (both control plane and agent), let’s use the installed one to deploy your first Kubernetes application with PipeCD.
2.1. Registering a Kubernetes application
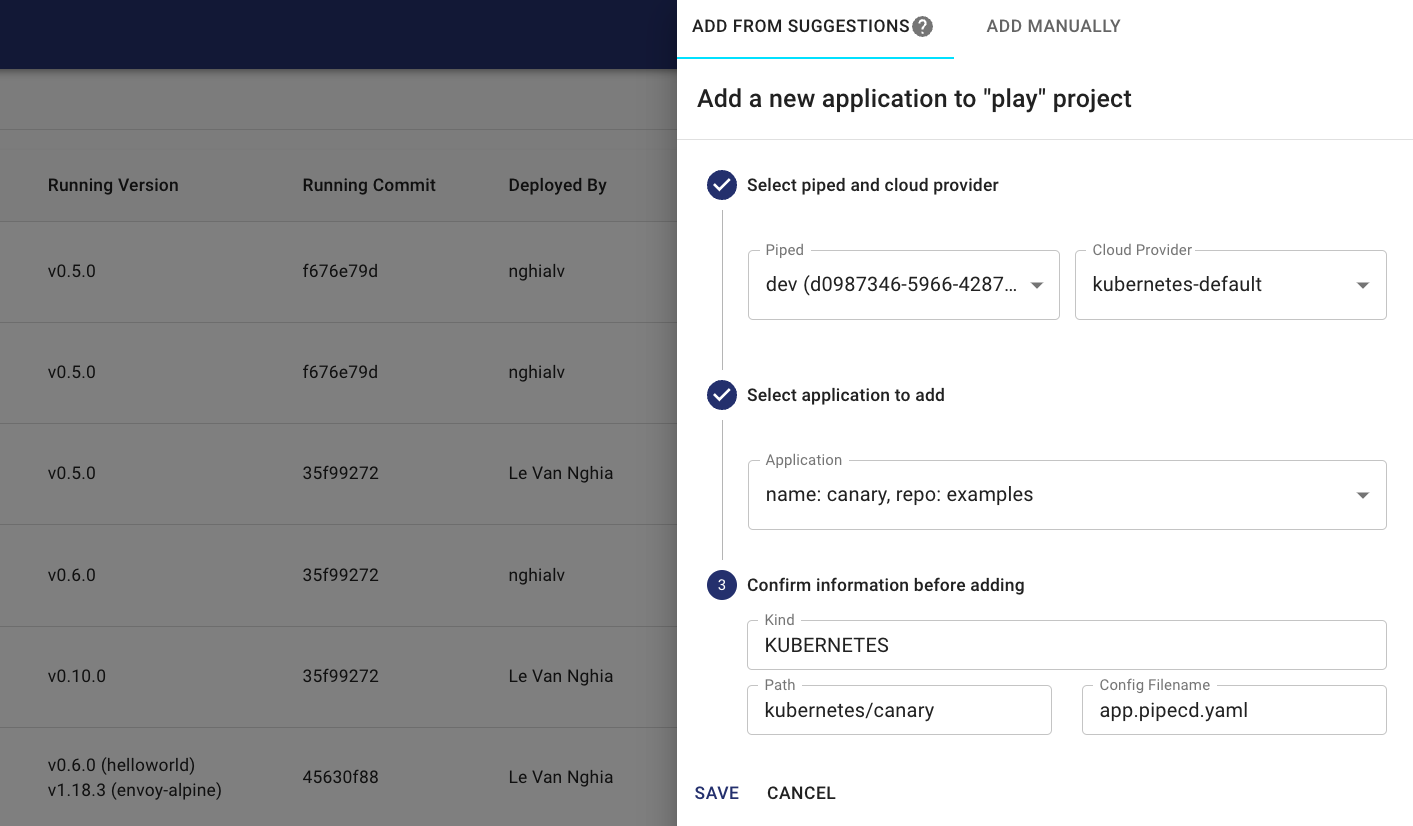
Navigate to the Applications page, click on the +ADD button on the top left corner.
Go to the ADD FROM SUGGESTIONS tab, then select:
- Piped:
dev(you just registered) - PlatformProvider:
kubernetes-default
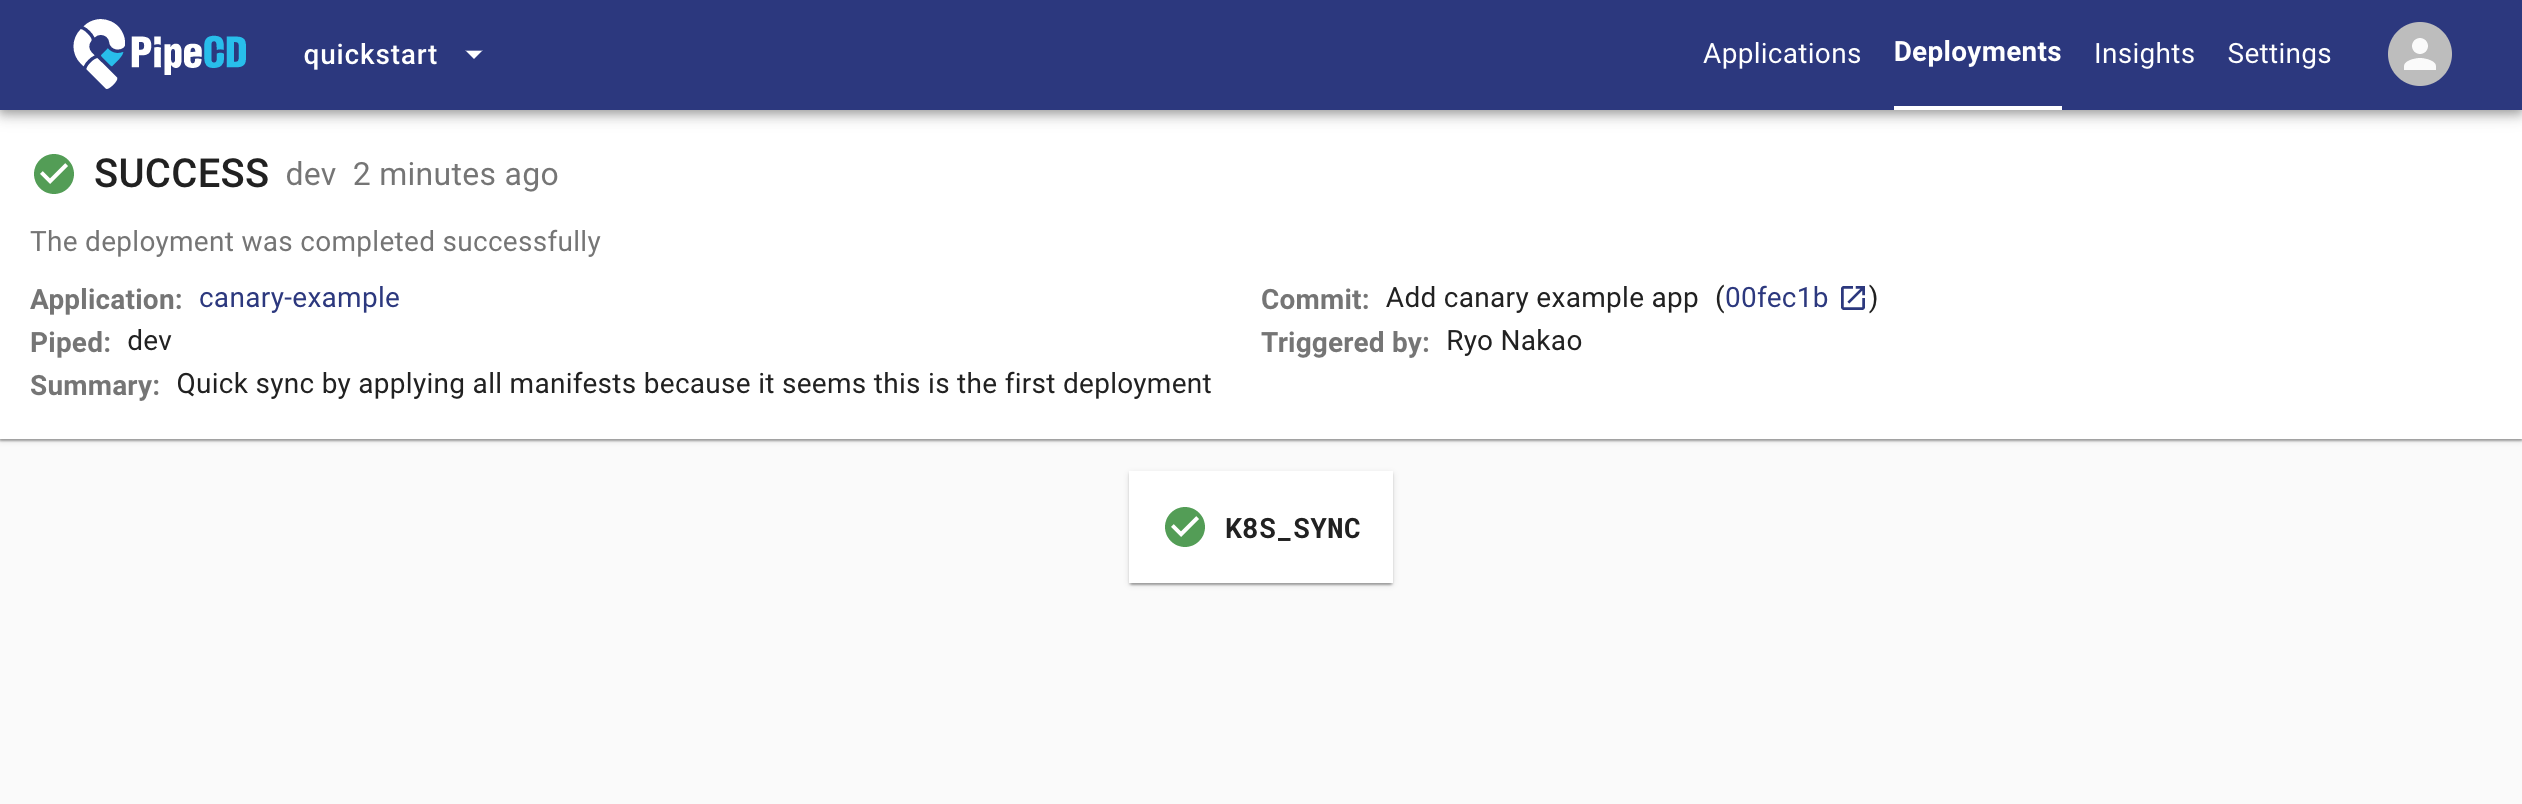
You should see a lot of suggested applications. Select the canary application and click the SAVE button to register.
After a bit, the first deployment is complete and will automatically sync the application to the state specified in the current Git commit.
2.2. Let’s deploy!
Let’s get started with deployment! All you have to do is to make a PR to update the image tag, scale the replicas, or change the manifests.
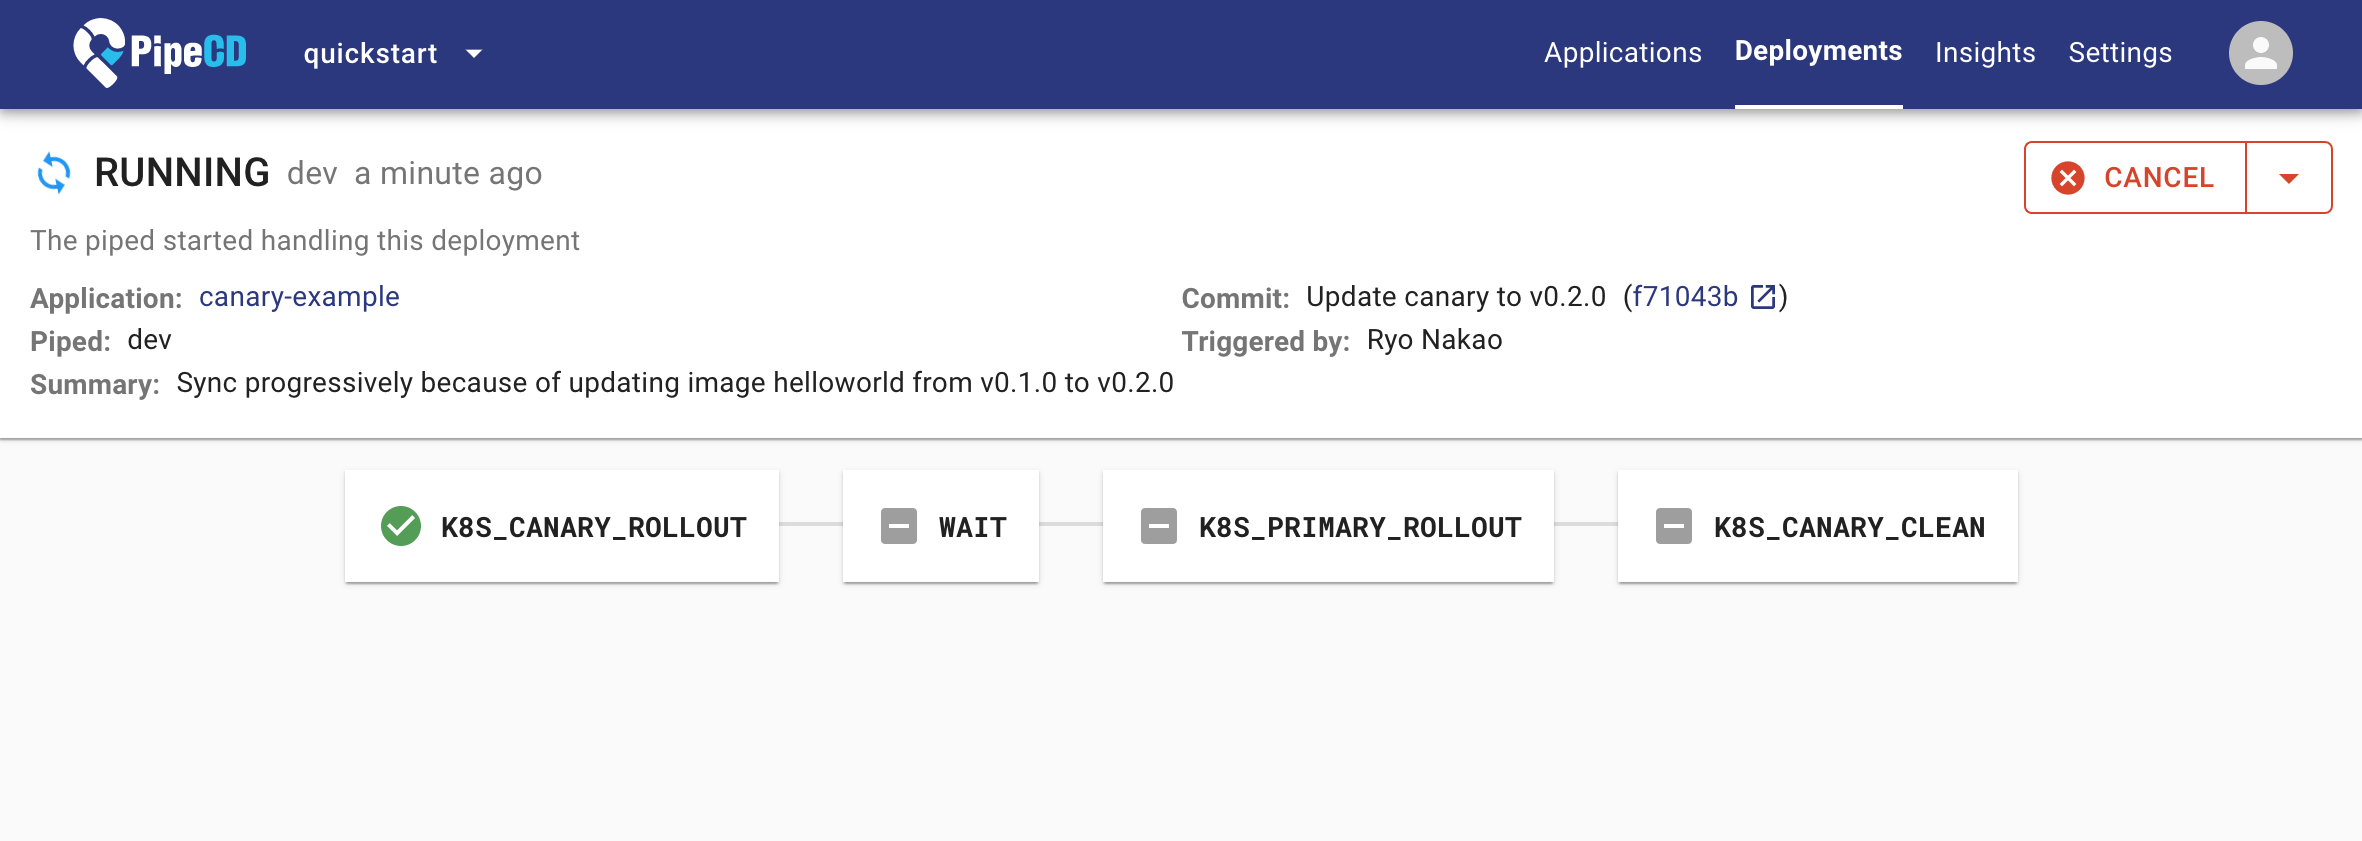
For instance, open the kubernetes/canary/deployment.yaml under the forked examples’ repository, then change the tag from v0.1.0 to v0.2.0.
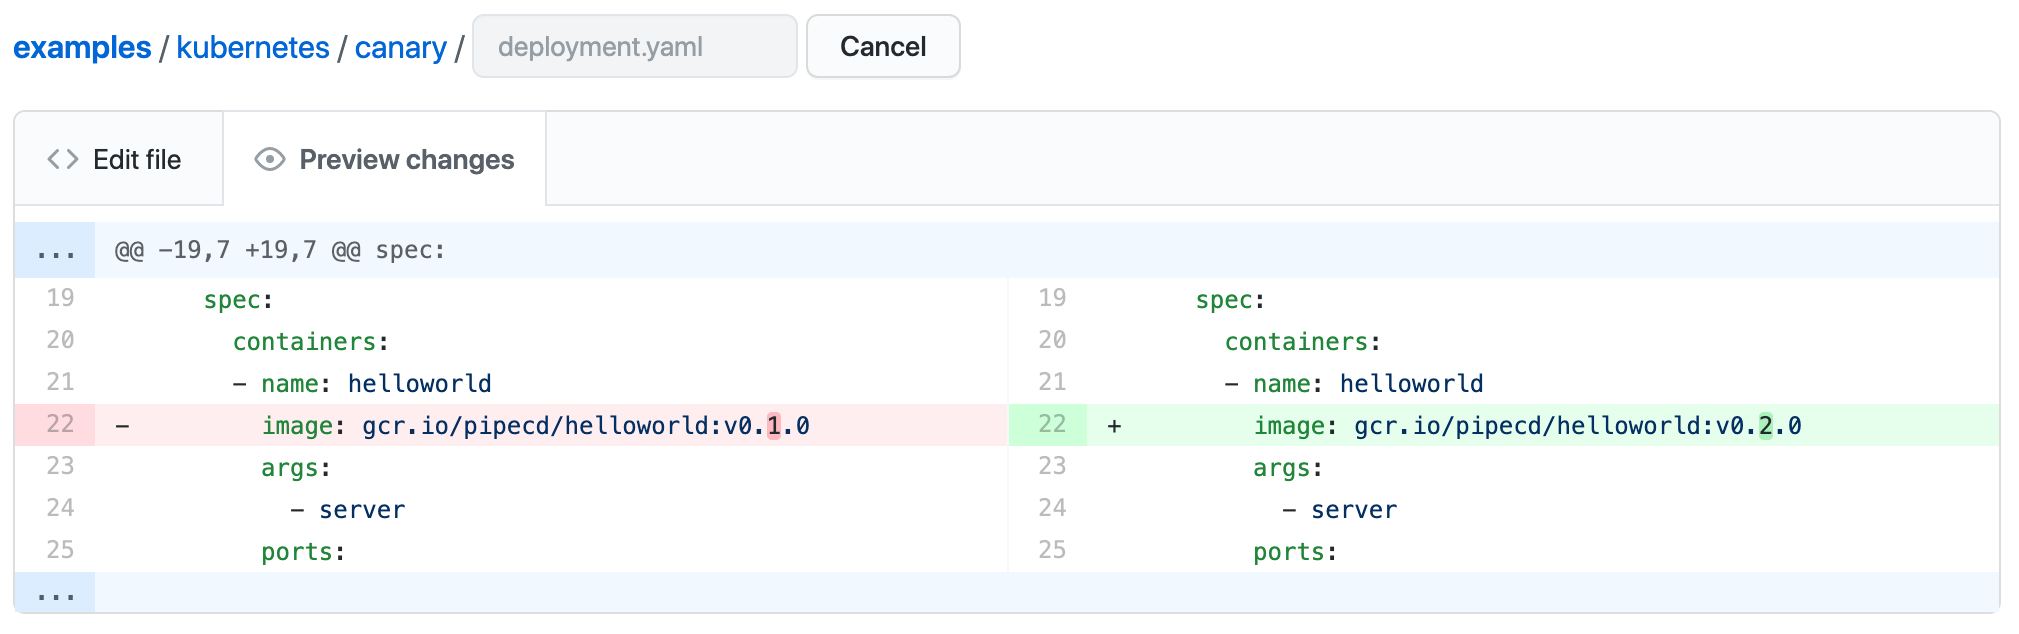
After a short wait, a new deployment will be started to update to v0.2.0.
3. Cleanup
When you’re finished experimenting with PipeCD quickstart mode, you can uninstall it using:
pipectl quickstart --uninstall
What’s next?
To prepare your PipeCD for a production environment, please visit the Installation guideline. For guidelines to use PipeCD to deploy your application in daily usage, please visit the User guide docs.
Feedback
Was this page helpful?
Glad to hear it! Please tell us how we can improve.
Sorry to hear that. Please tell us how we can improve.