Adding an application
An application is a collection of resources and configurations that are managed together.
It represents the service which you are going to deploy. With PipeCD, all the application manifests and its application configuration (app.pipecd.yaml) must be committed into a directory of a Git repository. That directory is called the application directory.
Each application is managed by exactly one piped instance. However, a single piped can manage multiple applications.
Starting PipeCD v1, you can deploy virtually any application on your desired platform using plugins. See more about plugins. Currently, the PipeCD maintainers team maintains plugins for Kubernetes and Terraform.
Preparing the application configuration file
You have to prepare a configuration file which contains your application configuration and store that file in the Git repository which your piped is watching first to enable adding a new application this way. The application configuration file name must be suffixed by .pipecd.yaml because the piped agent periodically checks for files with this suffix.
Note: Make sure that your Application Repository is listed in your
pipedconfiguration file. See thepipedConfiguration reference for more details.
The application configuration depends on the plugin that you are using for your deployment. Below is an example of what an application configuration file (app.pipecd.yaml) will look like. Please see Plugins and Application Configuration for more details on how to configure your app.pipecd.yaml in accordance with the plugin that you plan to use.
apiVersion: pipecd.dev/v1beta1
kind: Application
spec:
  labels:
    env: example
    team: product
  pipeline:
    stages: {}
    ...
  plugins: {}
Registering your application
Once you have configured your application configuration file, the next step is to register your application.
Registering the application helps PipeCD know:
- where the application configuration is placed
- which
pipedshould handle it and which platform the application should be deployed to.
You can register a new application from the web console (aka the Control Plane) by picking from a list of unused apps suggested by piped instances while scanning the git repositories connected to it.
You can also use the pipectl command-line tool to configure your application in the Control Plane. See adding a new application using pipectl.
Note: Manually configuring the application on the Control Plane is not supported for PipeCD v1 deployments (deployment using plugins) as of now. We are working on this feature.
Go to the PipeCD web console on application list page, click the +ADD button at the top left corner of the application list page and then switch to the PIPED v1 ADD FROM SUGGESTIONS tab.
Select the piped that you want to use and the deploy target that you want to deploy to. If you have configured your piped configuration file and the Application Repository correctly, all the applications in the target repository will be listed in the ‘Select application to add’ tab. Select the unregistered Application you want to deploy and click on ‘SAVE’. Your application should now be successfully registered and deploying on PipeCD.
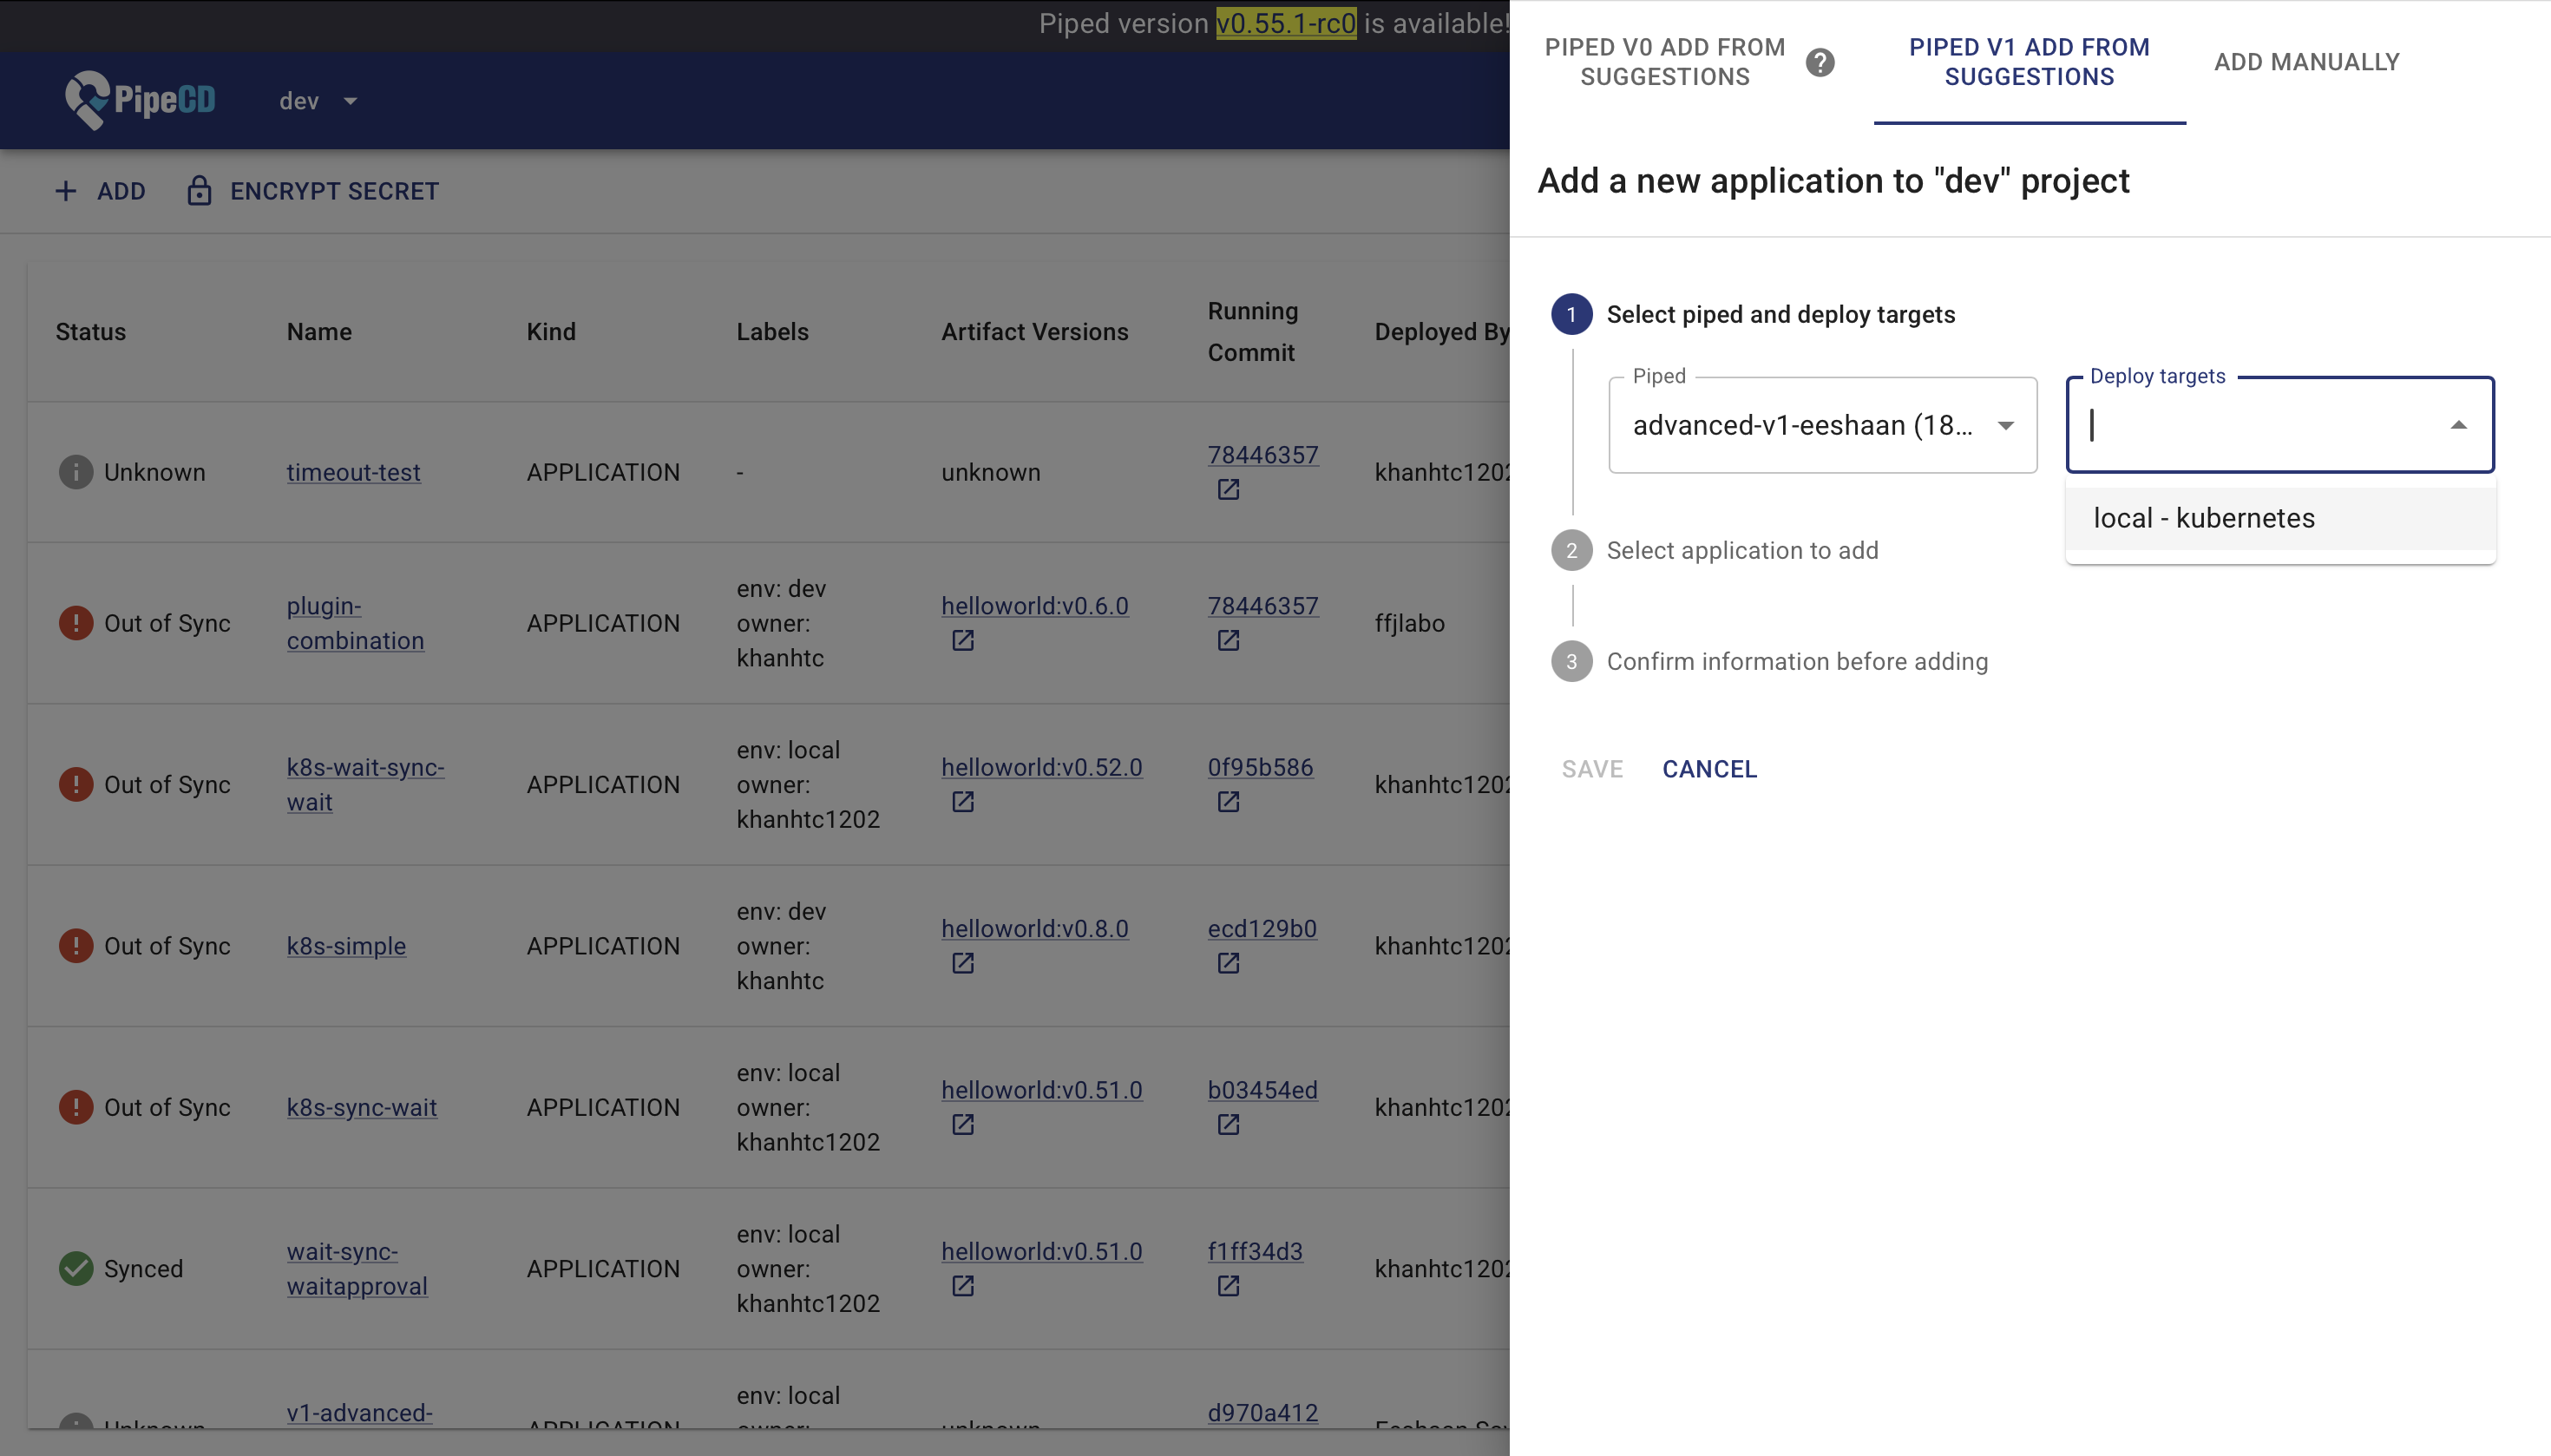
Registering an Application from Suggestions
Updating your application
The web console supports only enable, disable, and delete operations for your deployment. You cannot modify the application details from the web console (aka Control Plane).
To update your application, edit the app.pipecd.yaml file in your Git repository:
apiVersion: pipecd.dev/v1beta1
kind: Application
metadata:
  name: my-app
spec:
  name: new-name
  labels:
    team: new-team
Commit and push the changes. piped will detect the updates and apply them automatically, according to the configured deployment pipeline.
For all available configuration options, see the configuration reference.
Feedback
Was this page helpful?
Glad to hear it! Please tell us how we can improve.
Sorry to hear that. Please tell us how we can improve.